
Blog

Kitchen Island With Seating: Dimensions, Clearances and Design Ideas

The kitchen island has become the true center of the modern home. It is where coffee gets poured in the morning, homework gets done in the afternoon, and friends gather with a glass of wine while dinner cooks. Adding seating turns an island from a work surface into a social hub. But an island that is too big, too small or placed too close to the cabinets can make a kitchen feel cramped and frustrating.

At New Look Home Remodeling, we design islands for kitchens of all sizes across Park Ridge and the North Shore. This guide covers the measurements that matter, the seating styles to consider, and the design choices that make an island both beautiful and comfortable.

What Is a Kitchen Island?

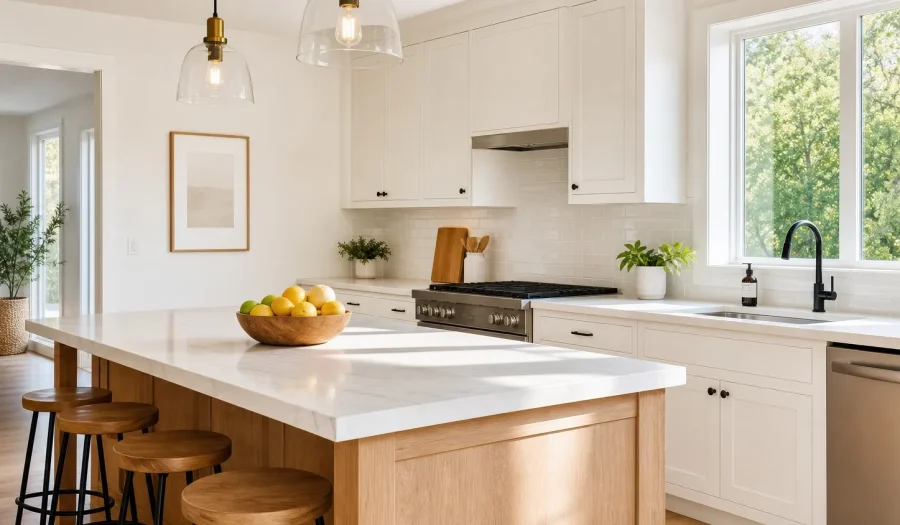
A kitchen island is a freestanding counter, usually with cabinets underneath, that sits in the middle of the kitchen and is open on all sides. Unlike a peninsula, which is attached to a wall or cabinet run, an island lets you walk around it. It can hold a sink, a cooktop, a dishwasher, a wine fridge or simply extra prep space and storage, and it can double as a breakfast bar or dining table.

Start With Clearances: The Space Around the Island

The most common island mistake is not the island itself. It is the space around it. Professional designers follow guidelines from the National Kitchen & Bath Association (NKBA):

  • Work aisles: at least 42 inches between the island and the surrounding counters for one cook, and 48 inches for two cooks.
  • Walkways (areas you pass through but do not work in): at least 36 inches.
  • Behind seated diners: at least 32 inches if no one needs to pass, 36 inches for someone to edge past, and 44 inches for someone to walk past comfortably.

Remember to account for appliance doors. A dishwasher or oven door that opens into a 42-inch aisle leaves very little room to stand. As a rule of thumb, a kitchen needs to be at least 12 to 13 feet wide to fit a working island with comfortable aisles on both sides.

Kitchen Island Dimensions

There is no single “standard” island size, but these ranges work well in most homes:

  • Minimum practical island: about 2 × 4 feet. It is useful as prep space, but too small for seating.
  • Island with seating for 2–3: about 3 × 6 to 4 × 7 feet.
  • Large island for 4 or more: about 4 × 8 to 5 × 10 feet.

Depth matters as much as length. A seating island needs enough depth for base cabinets (24 inches) plus the overhang. That is why 36 to 48 inches is a comfortable depth for most seating islands.

Seating Height and Overhang Guidelines

The height you choose determines the stools you buy and how much knee space you need.

Seating type Counter height Knee space (overhang) Stool/chair height
Table height 30″ 18″ 18″ chair
Counter height 36″ 15″ 24–26″ stool
Bar height 42″ 12″ 28–30″ stool

Allow about 24 inches of counter width per person, and 28 to 30 inches if the stools are wide or have arms. So a 6-foot island seats three people comfortably, not four.

Overhangs longer than 10 to 12 inches usually need support brackets, corbels or legs, depending on the countertop material. Heavy stone like granite and quartzite needs proper support. Our quartz vs granite vs quartzite guide explains how each material behaves.

Seating Layouts to Consider

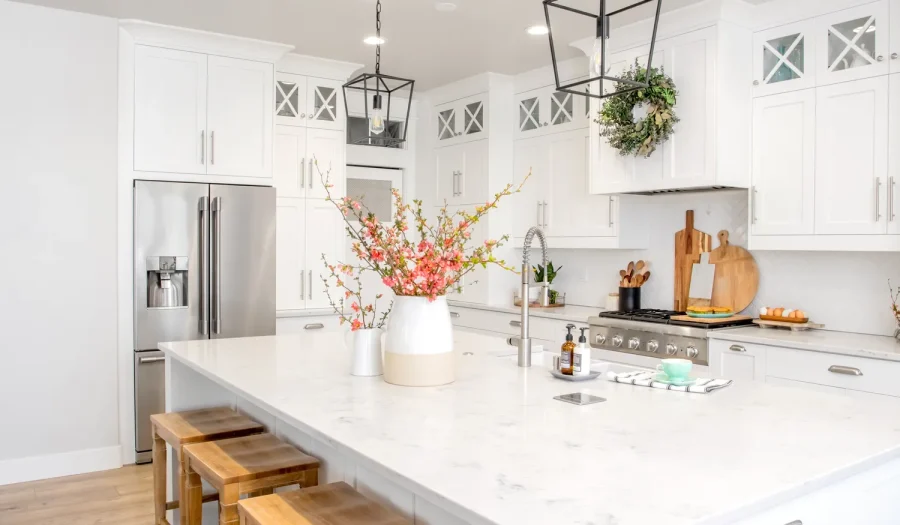
Single-side seating. Stools line up along the side facing away from the kitchen. This is the most common and space-efficient layout, ideal for open floor plans.

L-shaped seating. Seats wrap around one end of the island, so guests can face each other. It is great for conversation, but it requires a larger island.

Two-level island. A raised bar-height ledge hides kitchen clutter from the living area, while the lower counter stays usable for prep. It works well in open concept kitchens.

Table-height extension. A lower dining extension at one end turns the island into a full family table. It is perfect for homes without a separate dining room.

What to Put in Your Island

A well-planned island does more than provide seating. Popular options include:

  • Prep sink: creates a second work zone, but requires plumbing in the floor.
  • Cooktop: lets the cook face guests, but needs ventilation above or downdraft ventilation.
  • Dishwasher: keep it at least 21 inches from the corner and away from the seating side.
  • Drawers and deep storage: pots, pans and small appliances fit neatly below the counter.
  • Microwave drawer or beverage fridge: keeps traffic away from the main cooking zone.
  • Electrical outlets: building codes require outlets on islands. Plan their placement for laptops, phone chargers and small appliances.

One tip from experience: avoid placing a cooktop directly in front of the seating. Splatter and heat make it uncomfortable, and it can be unsafe for children.

Design Ideas That Make an Island Stand Out

  • Contrasting color. A navy, sage green or natural wood island against white perimeter cabinets adds depth without overwhelming the room. Shaker-style doors are a timeless choice.
  • Waterfall countertop. Running the countertop down the sides gives a sleek, modern look, especially with dramatic veining.
  • Statement lighting. Two or three pendants centered over the island provide task light and act as jewelry for the kitchen. Hang them about 30 to 36 inches above the countertop.
  • Coordinated hardware. Match or intentionally contrast your island pulls with the rest of the kitchen. See our guide to kitchen hardware colors in style right now.
  • Furniture-style details. Turned legs, open shelving and beadboard panels suit a country style kitchen.

When an Island Doesn’t Fit

If your kitchen is too narrow for proper clearances, consider a peninsula, a rolling cart, or a slim counter-height table. Sometimes reworking the layout, removing a wall or extending existing cabinets creates the space you need. That is where a professional layout plan pays off.

Frequently Asked Questions

How much space do you need for a kitchen island with seating?

Plan for at least 42 inches of clearance on working sides and 36 to 44 inches behind seated guests.

How much overhang do you need for island seating?

You need 15 inches at counter height (36″) and 12 inches at bar height (42″).

How many stools fit at a kitchen island?

Allow about 24 inches of counter length per stool.

Design Your Island With Confidence

A great island feels effortless, but it comes from careful measuring and planning. New Look Home Remodeling designs and builds custom kitchen islands for homes in Park Ridge, Wilmette, Winnetka and across the northern suburbs. Explore our gallery for inspiration, read the steps to remodel a kitchen, and contact us to start planning your new kitchen.

Quartz vs Granite vs Quartzite: Which Countertop Is Right for Your Kitchen?

Few decisions in a kitchen remodel shape the look and feel of the room as much as the countertop. It is the surface you touch every day, the backdrop for every meal, and often the first thing guests notice. Three materials dominate the conversation today: quartz, granite and quartzite. They sound similar, and they can look similar in a showroom, but they behave very differently once they are installed in a busy home.

At New Look Home Remodeling, homeowners across Park Ridge and the North Shore ask us some version of this question almost every week. This guide explains how each material is made, how it holds up to heat, stains and daily wear, and which lifestyle it suits best.

What Is Quartz? (And Is It Man-Made?)

Yes, quartz countertops are engineered. Manufacturers blend roughly 90–93% crushed natural quartz with polymer resins and pigments, then press the mixture into dense slabs. The result is a surface that combines the hardness of stone with a very consistent appearance.

Strengths of quartz:

  • Non-porous. The resin fills every gap, so liquids like wine, coffee and oil cannot soak in. That is why quartz never needs sealing.
  • Consistent patterns. If you want a clean white, a uniform grey or a marble-look slab without dramatic surprises, quartz delivers exactly what you saw in the sample.
  • Hygienic. A non-porous surface does not harbor bacteria in tiny pores, which makes quartz popular in family kitchens.

Weaknesses of quartz:

  • Heat sensitivity. This is the most common question we hear: can you put hot pans on quartz? The answer is no. The stone itself handles heat well, but the resin binder can scorch, yellow or crack from thermal shock when a pan comes straight off the burner. Always use a trivet.
  • Sun exposure. Direct UV light can fade some quartz colors over time, so it is not a good choice for outdoor kitchens or very sunny spots.

What Is Granite?

Granite is a 100% natural igneous rock, quarried in large blocks and cut into slabs. No two slabs are identical. The speckles, flecks and veins come from minerals like feldspar, mica and quartz that crystallized deep underground.

Strengths of granite:

  • Excellent heat resistance. Granite formed under extreme heat, so a hot pot will not harm it (although a trivet is still a good habit).
  • One-of-a-kind character. Every slab is unique, which appeals to homeowners who want a natural, organic look, especially in a country style kitchen or a traditional design.
  • Durability. Granite resists scratches from everyday use and lasts for decades.

Weaknesses of granite:

  • It is porous. Granite needs to be sealed after installation and resealed periodically. A simple water test works: if water darkens the stone within a few minutes, it is time to reseal.
  • Pattern variability. What you see in a small sample may differ from the full slab, so we always recommend viewing your actual slab before fabrication.

What Is Quartzite? (And How Is It Different From Quartz?)

This is where most of the confusion happens. Quartzite is not the same as quartz. Quartzite is a natural metamorphic rock that started as sandstone and was transformed by heat and pressure into an extremely hard, dense stone. It often looks like marble, with soft, flowing veins, but it performs much more like granite.

Strengths of quartzite:

  • Exceptional hardness. Quartzite is one of the hardest countertop materials available, harder than granite and far harder than marble.
  • Heat and UV resistant. As a natural stone, it tolerates hot cookware and sunlight well.
  • Luxury marble look. It gives you the elegance of marble without its fragility.

Weaknesses of quartzite:

  • It needs sealing. Like granite, quartzite is porous to varying degrees and should be sealed.
  • Mislabeled stones. Some slabs sold as “soft quartzite” are actually marble or dolomite. They etch when they meet lemon juice or vinegar. Ask your fabricator to perform a scratch or acid test before you commit.

Side-by-Side Comparison

Feature Quartz Granite Quartzite
Origin Engineered Natural Natural
Sealing required No Yes Yes
Heat resistance Low–moderate High High
Stain resistance Excellent Good (when sealed) Good (when sealed)
Scratch resistance Very good Very good Excellent
Pattern consistency Very consistent Unique Unique
Outdoor use Not recommended Yes Yes

Which Countertop Fits Your Lifestyle?

The “best” countertop depends on how you actually use your kitchen.

Choose quartz if you have young kids, you want the lowest-maintenance surface possible, or you love a clean, uniform look. Quartz works beautifully in modern and transitional kitchens, and it pairs well with almost any hardware finish.

Choose granite if you cook a lot, move pots around quickly, and like the depth of natural stone. Granite is also a great fit for large islands where a unique slab can become the focal point.

Choose quartzite if you want the high-end look of marble but need a surface that will stand up to real family life. It is ideal for statement islands and open concept kitchens where the countertop is on display.

How to Care for Each Material

  • Quartz: Wipe it down with mild dish soap and warm water. Avoid bleach, oven cleaners and abrasive pads, which can dull the resin. Never place hot pans directly on the surface.
  • Granite: Use a pH-neutral stone cleaner. Wipe spills promptly, especially oils and acids, and reseal when the water test shows absorption.
  • Quartzite: Treat it like granite. Clean with pH-neutral products, seal regularly, and use cutting boards to protect both the stone and your knives.

Coordinating Your Countertop With the Rest of the Kitchen

Your countertop should work with your cabinets, backsplash and flooring, not compete with them. A busy granite pairs best with simple cabinetry and a plain backsplash. A quiet white quartz gives you room for bolder tile or colored cabinets. If you are extending your kitchen cabinets or adding an island, plan the slab layout early so seams land in logical places.

We always recommend bringing cabinet door samples and paint swatches to the stone yard. Seeing the materials together is the fastest way to avoid regrets. For more planning advice, read our guide to the steps to remodel a kitchen.

Frequently Asked Questions

Is quartz better than granite?

Neither is universally better. Quartz wins on stain resistance and low maintenance. Granite wins on heat resistance and natural character.

Does quartz stain?

Quartz is highly stain resistant because it is non-porous. Harsh chemicals and high heat can still discolor the resin.

Do quartz countertops need to be sealed?

No. Granite and quartzite do.

What is the difference between quartz and quartzite?

Quartz is engineered from crushed quartz and resin. Quartzite is a natural metamorphic stone.

Get Expert Help Choosing Your Countertop

Choosing a countertop is easier with someone who has installed all three materials in real homes. Our team helps homeowners in Park Ridge, Glenview, Evanston and nearby suburbs select materials that match their style and daily routine. Browse finished kitchens in our gallery, then contact New Look Home Remodeling to start planning your kitchen.

What Is a Country Style Kitchen?

What Is a Country Style Kitchen? A Timeless Look That Never Goes Out of Style

At New Look Home Remodeling, we get asked all the time: “What exactly is a country style kitchen, and would it work in my home?” It’s one of our favorite design styles to build, and for good reason – it’s warm, welcoming, and endlessly livable.

The Heart of the Home

A country style kitchen is all about comfort. Think of the farmhouse kitchens you see in movies: a big farmhouse sink, open shelving, warm wood tones, and plenty of space for family and friends to gather. Unlike sleek, minimalist modern kitchens, country kitchens embrace texture and character. Nothing feels too precious to touch.

Key Features We Love to Design

When our team designs a country kitchen, a few elements come up again and again:

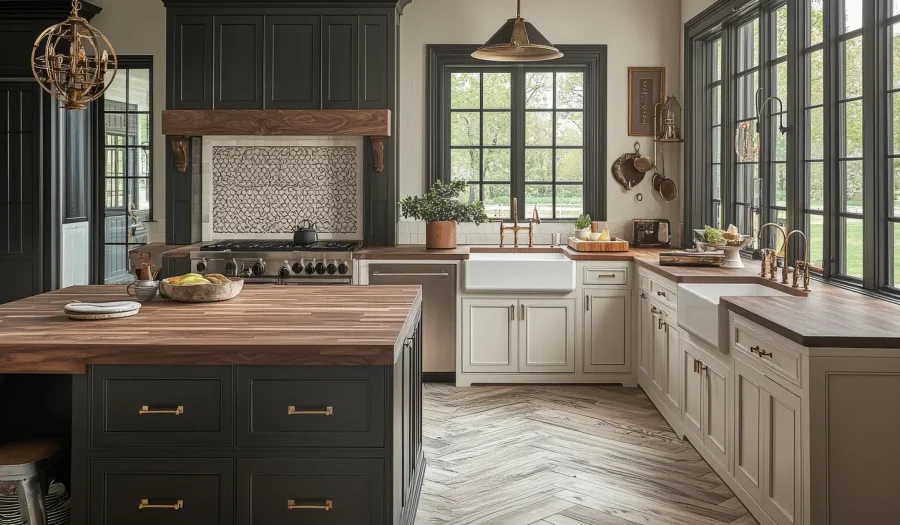
  • Farmhouse sinks – Large, apron-front sinks that are as functional as they are charming.
  • Natural wood cabinetry – Often painted in soft whites, creams, sage greens, or classic blues, sometimes left in a natural wood finish for extra warmth.
  • Open shelving – Perfect for displaying dishware, mason jars, and cookbooks.
  • Butcher block or wood countertops – Adding organic texture alongside (or instead of) stone.
  • Vintage-inspired hardware – Bin pulls, cup pulls, and oil-rubbed bronze or brass fixtures.
  • Beadboard or shiplap accents – A subtle nod to traditional farmhouse walls and cabinet fronts.
  • A statement island – Often a different color or material than the surrounding cabinetry, and big enough for baking projects, homework, or morning coffee.

Why Homeowners Love It

Country kitchens work because they balance charm with practicality. They’re designed to be lived in – spills, flour dust, and muddy paw prints included. This style also pairs beautifully with modern conveniences, so you don’t have to sacrifice function for character. A country kitchen can include high-end appliances, smart storage solutions, and energy-efficient lighting, all wrapped in a cozy, timeless aesthetic.

It’s also a wonderfully flexible style. Whether your home is a historic farmhouse or a suburban split-level, country design elements can be tailored to fit the architecture and your personal taste – from a full farmhouse transformation to subtle country touches layered into a more transitional kitchen.

Let’s Bring Your Country Kitchen to Life

At New Look Home Remodeling, we specialize in creating kitchens that feel like they were made for your family – not copied from a catalog. From selecting the right cabinetry and countertops to planning layouts that maximize both beauty and function, our design team handles every detail of your country style kitchen remodel from start to finish.

If you’ve been dreaming of a warm, welcoming kitchen with farmhouse charm, we’d love to help bring that vision to life. Contact New Look Home Remodeling today to schedule your free consultation and discover how a country style kitchen can transform the way your family gathers, cooks, and lives.

What to Do With Concrete Basement Floor: Transform an Overlooked Space Into Something Amazing

“`html

What to Do With a Concrete Basement Floor: Transform an Overlooked Space Into Something Amazing

For many homeowners, the basement is one of the most underutilized areas of the house. Often used for storage, laundry, or simply left unfinished, it can become a forgotten space that lacks both comfort and style. However, your concrete basement floor holds far more potential than you might think. With the right approach, it can become the foundation of a beautiful, functional, and long-lasting living area.

So, what should you do with a concrete basement floor?

Start With a Professional Assessment

Before making any design decisions, it’s important to evaluate the current condition of the floor. Cracks, uneven surfaces, moisture issues, and stains can all affect the final result. While some imperfections may seem minor, they can become bigger problems over time if not addressed properly.

A professional inspection helps identify any underlying issues and ensures that the floor is prepared correctly before any finishing work begins.

Consider Modern Finishing Options

Gone are the days when concrete floors were considered dull and unattractive. Today, homeowners have access to a wide range of finishing solutions that can dramatically improve the appearance and performance of basement floors.

Popular options include:

  • Polished concrete for a sleek, contemporary look
  • Epoxy coatings for durability and stain resistance
  • Decorative concrete finishes that mimic stone, tile, or other materials
  • Sealed concrete surfaces that are easy to maintain and resistant to moisture

Each option offers unique benefits, making it possible to create a basement that matches your style, budget, and lifestyle needs.

Improve Durability and Protection

Basements are often exposed to higher humidity levels than other parts of the home. This makes floor protection especially important. Proper sealing and finishing not only enhance appearance but also help protect against moisture penetration, mold growth, and everyday wear and tear.

Investing in a professional flooring solution can significantly extend the lifespan of your basement floor while reducing future maintenance costs.

Increase Your Home’s Usable Space

A finished concrete basement floor opens the door to countless possibilities. You can transform your basement into:

  • A family entertainment room
  • A home office
  • A personal gym
  • A guest suite
  • A playroom for children
  • A workshop or hobby space

By upgrading the floor, you create a cleaner, more comfortable environment that encourages you to make better use of the space.

Why Professional Installation Matters

While DIY products may seem appealing, achieving a flawless and long-lasting result requires experience, proper equipment, and high-quality materials. Professional installers understand how to prepare concrete surfaces correctly, apply coatings evenly, and ensure maximum durability.

The difference is often visible immediately. A professionally finished basement floor not only looks better but also performs better for years to come.

Final Thoughts

Your concrete basement floor is more than just a slab beneath your feet—it’s an opportunity to unlock the full potential of your home. Whether you’re looking for a modern aesthetic, increased durability, or a complete basement transformation, the right flooring solution can make all the difference.

If you’re considering upgrading your basement, working with experienced professionals can help you achieve beautiful, lasting results while avoiding costly mistakes. With expert guidance and quality craftsmanship, your basement can become one of the most valuable and enjoyable spaces in your home.

“`

How to Extend Kitchen Cabinets and Transform Your Kitchen Space

When homeowners start thinking about upgrading their kitchen, many immediately imagine a complete renovation. However, a full remodel is not always necessary. One of the most effective and budget-friendly ways to improve both the appearance and functionality of a kitchen is by extending existing kitchen cabinets. This solution can dramatically increase storage space, create a more polished look, and even add value to a home without the disruption of a major renovation.

Why Extend Kitchen Cabinets?

Many kitchens have unused space above the cabinets that collects dust and makes the room feel unfinished. Extending cabinets to the ceiling helps maximize every inch of available space while creating a custom, high-end appearance. The additional storage can be used for seasonal cookware, serving dishes, small appliances, or pantry items that are not needed every day.

Beyond practical benefits, cabinet extensions can completely change the visual impact of a kitchen. Taller cabinets draw the eye upward, making ceilings appear higher and the room feel larger and more elegant.

Popular Cabinet Extension Options

There are several ways to extend kitchen cabinets depending on the layout, style, and budget of the project.

Full-height cabinet extensions are among the most popular choices. Additional cabinet boxes are installed above existing cabinets to create seamless storage that reaches the ceiling.

Decorative extensions can incorporate crown molding, custom trim, or glass-front cabinet sections to enhance the kitchen’s design while maintaining a sophisticated look.

Open shelving additions are another option for homeowners who want a combination of extra storage and decorative display space.

Choosing the right solution requires careful planning to ensure the new sections match the existing cabinetry in both style and structure.

Why Professional Installation Matters

While extending kitchen cabinets may appear straightforward, the reality is often far more complex. Precise measurements, structural considerations, material matching, and proper installation techniques are essential for achieving a professional result.

DIY attempts can lead to uneven cabinet alignment, visible gaps, mismatched finishes, or even damage to existing cabinetry. What initially seems like a cost-saving project can quickly become more expensive when repairs or corrections are needed later.

Professional installers have the experience, tools, and expertise required to ensure that cabinet extensions blend seamlessly with the original design. They can also identify potential issues before work begins, helping homeowners avoid unexpected complications.

A Smart Investment for Your Home

Extending kitchen cabinets is a practical upgrade that combines improved functionality with enhanced aesthetics. Whether the goal is creating additional storage, achieving a more custom look, or increasing property value, professionally installed cabinet extensions offer long-term benefits that homeowners can enjoy for years.

If you are considering upgrading your kitchen, consulting experienced professionals is often the best first step. Expert guidance can help you explore the most suitable options for your space, ensure a flawless finish, and deliver results that are difficult to achieve through a DIY approach. Investing in professional cabinet extension services can save time, reduce stress, and help bring your vision to life with confidence.

What Color Kitchen Hardware Is in Style Right Now?

When it comes to kitchen design, the smallest details can make the biggest impact. One of those subtle yet powerful details is your kitchen hardware – the knobs, pulls, and handles that tie the entire space together. Choosing the right finish can completely transform the feel of your kitchen, whether you’re updating your cabinets or doing a full remodel. So, what’s trending in kitchen hardware colors right now? Let’s dive in.

1. Warm and Timeless: Brushed Brass

Brushed brass continues to reign as one of the most popular choices. Its soft golden tone adds warmth and elegance without being too flashy. It pairs beautifully with white, navy, and even black cabinetry, creating a balanced and inviting look. Unlike the shiny brass of the past, today’s brushed finish feels modern, understated, and sophisticated.

2. Sleek and Modern: Matte Black

Matte black hardware has quickly become a kitchen staple. It’s bold, minimalistic, and effortlessly stylish. Whether used in a contemporary or farmhouse-style kitchen, black hardware adds contrast and a sense of depth. It also hides fingerprints better than polished metals – a practical bonus for busy homes.

3. Classic and Cool: Polished Nickel

If you prefer something timeless with a touch of luxury, polished nickel might be the perfect choice. It has a slightly warmer tone than chrome, making it a versatile option that works with both cool and warm color palettes. Plus, its subtle shine adds a hint of glamour without overwhelming the space.

4. Organic and Trendy: Mixed Metals

Mixing metals is one of the most exciting trends in kitchen design. Pairing matte black pulls with brass faucets or combining brushed nickel with copper accents creates visual interest and personality. The key is balance – repeat each finish at least twice throughout the room for a cohesive feel.

5. Soft and Subtle: Champagne Bronze

For those who love something unique yet timeless, champagne bronze is having a major moment. With its muted golden hue and satin-like finish, it’s softer than brass but warmer than nickel. It’s perfect for creating a cozy, welcoming atmosphere.

Whether you prefer bold contrast or soft sophistication, the right kitchen hardware color can instantly elevate your space. Updating your cabinet handles is one of the easiest ways to refresh your kitchen without a full renovation – and the results can be stunning.

Thinking about giving your kitchen a new look? Start with the details – they’re what make your kitchen truly yours.

Can You Remodel a Manufactured Home?

When people think about home remodeling, traditional site-built houses often come to mind. But what about manufactured homes? Can you remodel a manufactured home to reflect your style, boost functionality, or even increase its value? The short answer is yes — and in many cases, the results can be stunning.

Understanding the Basics

Before diving into the process, it’s essential to understand what a manufactured home is. Unlike modular or traditional homes, manufactured homes are built in a factory and transported to their final location. Because they follow specific building codes (HUD Code), some homeowners wonder: can you remodel a manufactured home without running into major restrictions? Absolutely — as long as you understand the structure and adhere to local codes and guidelines.

Common Remodeling Projects for Manufactured Homes

Whether you’re planning to refresh your kitchen, update the bathroom, or open up your living space, you’ll find plenty of remodeling opportunities. Can you remodel a manufactured home to look and feel like a modern house? Yes — especially with popular upgrades such as:

  • Kitchen renovations: Replace outdated cabinets, upgrade appliances, or add an island.

  • Bathroom makeovers: Install new vanities, walk-in showers, or improved lighting.

  • Flooring updates: Swap carpet for luxury vinyl planks or laminate.

  • Interior walls: Remove non-load-bearing walls or add drywall for a finished look.

These changes not only improve appearance but can significantly enhance comfort and functionality.

Structural and Legal Considerations

One of the most common questions is: can you remodel a manufactured home without compromising its structural integrity? With the right planning, yes. However, manufactured homes have unique features — like steel frames or thinner walls — that may affect your plans. That’s why working with a professional home remodeling company is crucial.

You’ll also need to check with your local jurisdiction about zoning laws and permitting requirements. Any major work, especially structural or electrical, may require permits.

Boosting Value and Livability

Can you remodel a manufactured home to increase resale value? While manufactured homes may not appreciate in the same way as site-built homes, remodeling can still enhance their market appeal. Energy-efficient windows, updated kitchens, and modern finishes make your home more attractive to future buyers — and more enjoyable for your family today.

Final Thoughts

So, can you remodel a manufactured home and make it truly your own? Without a doubt. With the help of an experienced remodeling team, you can turn your manufactured home into a beautiful, comfortable, and customized living space. Whether you’re making small cosmetic upgrades or planning a full renovation, your vision is well within reach.

Looking to remodel your manufactured home? Contact our remodeling experts today and let’s bring your ideas to life.

Basement with Low Ceiling Remodel: Transforming Your Space

When it comes to remodeling a basement, a common challenge homeowners face is the low ceiling height. A basement with low ceiling remodel can seem daunting, but with the right design strategies and creative solutions, you can transform it into a functional and stylish space that enhances your home.

Maximizing Vertical Space

One of the key elements of a basement with low ceiling remodel is making the most out of the available vertical space. Instead of focusing on height, consider using light colors on the walls and ceiling to create the illusion of a larger space. Opt for lighter shades like whites, creams, or pale grays, as they reflect light and help brighten the area.

Additionally, consider using recessed lighting instead of hanging light fixtures. Recessed lighting will not only save valuable headspace but also offer a sleek and modern look. Track lighting can also be a great option for smaller spaces, allowing you to direct light exactly where it’s needed.

Creative Ceiling Solutions

For a basement with a low ceiling remodel, creative ceiling treatments can make a huge difference. Consider installing a drop ceiling or using exposed beams to give the space an industrial or rustic feel. By lowering the ceiling height even further with a drop ceiling, you can hide pipes and ducts, which often cause visual clutter. It can also provide a clean, organized look while maintaining headroom.

If you’re looking for a more modern, open feel, a sleek, smooth drywall ceiling can help create a seamless look that doesn’t compete with the rest of the room’s design.

Furniture and Layout

In a basement with low ceiling remodel, the furniture arrangement can make a significant impact on the room’s feel. Opt for low-profile furniture to avoid overwhelming the space. Low couches, low-slung tables, and even low storage units will prevent the room from feeling cramped.

Also, consider an open floor plan if the space allows for it. This layout will help eliminate any heavy partition walls and create a sense of flow, making the space feel more open and less confined.

Utilizing Smart Storage Solutions

In a basement with a low ceiling remodel, maximizing storage is crucial. Look for creative ways to integrate storage into the design. Built-in shelves and under-stair storage are great ways to use vertical space without taking up additional room. If possible, add multi-purpose furniture, such as ottomans or tables with built-in storage, to help keep the space clutter-free and organized.

Consider the Function of Your Basement

Finally, think about how you’ll use your remodeled basement. A basement with low ceilings is ideal for certain activities that don’t require a lot of headspace, such as a home theater, a game room, or a cozy reading nook. Focus on making the room comfortable and functional for your lifestyle, and use smart design to overcome the ceiling height challenges.

Conclusion

A basement with low ceiling remodel may seem like an obstacle, but with the right design choices, it can become one of your home’s most charming and functional spaces. By utilizing clever design tricks, choosing the right lighting, and focusing on furniture and storage solutions, you can create a beautiful, efficient basement that fits your needs. If you’re ready to get started on your basement remodel, consider working with a professional remodeling company to bring your vision to life.

Steps To Remodel A Kitchen

A kitchen makeover is one of the best ways to add value to a home. But what does that mean exactly, and what can people expect to happen? If you want to do some of the work yourself, it’s even more important to know how things work. Even if you’re going it alone, you still need to call a pro for services like plumbing.


If you outsource everything to experts like most people, you’ll need to find, screen, and hire designers and contractors (or find a design-build firm that handles both the design and construction phases). Aside from this, you don’t have to do any of the work yourself, but if you know how to redo a kitchen the right way, you can better plan and schedule your activities around it with this kitchen remodel steps.


Tear Down And Knockdown

The first step in remodeling a kitchen is to take things apart. Before you can make a beautiful new place, you need to tear down and get rid of anything that is old or broken. This is when you tear out everything you do not wish to retain, including walls, cabinets, flooring, and other fixtures. Some property owners like to do this step themselves, but it’s usually best to hire a professional worker to do the job. Teams with experience know how to avoid wiring and lines that are hidden behind walls or under cabinets.

Kitchen Remodel worm's view installed in a new kitchen

Work On The Rough-In, Such As Framing And Plumbing

The next step in remodeling a kitchen is to finish the rough-in work, which includes any structure and wiring. Think of this step as everything that goes on the walls or inside the walls.

In some cases, this step is as easy as changing the wall framing around a new center table. In big remodeling jobs, this might mean moving water fixtures a few feet away from where they were before or building new concrete to add more room.

This step takes a lot of time, so it’s best to leave it to a skilled building crew.


A Professional Checkup

After you’ve completed the rough-in work, it’s time for a professional examination. Most of the time, all you have to do is call the city or county and make an appointment. In some places, you might have to pay a small fee.

If you’ve followed all the building rules for your area, there shouldn’t be a problem and you can move on to the next step. If you fail? So, you figure out what went wrong and move on.

If you chose a professional builder, they will usually take care of both the check and the kitchen remodel order of steps to fix any mistakes. But if you’ve managed the process on your own and failed inspection, you may want to contact a licensed professional for assistance in achieving the ultimate goal: approval to continue!


Completing The Walls

Once a remodeling job has been inspected and found to be in good shape, the walls can be finished. Your job plan will tell you how to hang, tape, and finish drywall. This includes any drywall needed for a tabletop bar or another part of the kitchen. If you aren’t good at this, you might want to hire a professional to finish the job.

Even though you won’t be painting the walls for a while, this is a good time to put on a coat of primer. Why? The sealer covers the facing paper and keeps it from getting scratched or dinged when other things are put up in the room. Accidents happen while you’re moving large cabinets and appliances into the room, and this maintains it in perfect condition until you’re ready to add a dash of your favorite color later on in the makeover process.


Door And Window Installation

After the walls are done, you can put in the doors and windows. If you keep the same layout as your existing kitchen, you may not need to change anything for this phase. Simply wash down your old windows with a decent cleanser and caulk any existing gaps around them to improve insulation.

Make sure to properly seal any new doors or windows you add to the room. Most of a home’s annual energy costs come from the hot and cold air that is lost. Unsealed kitchen windows can cost you hundreds of dollars in heating and cooling costs, in addition to diminishing the comfort of your home.

You’ll also want to make sure that the trim is in place, which will make it easier to put the cabinets in the right place. If you don’t do this, there could be holes, which could lead to bigger problems later in the plan for the repair.

Cabinets And Plumbing Fixtures Are Needed

The next step in the process of remodeling is to put in the cabinets and plumbing fixtures. At this time, you can also put in new countertops. In many situations, it’s the most enjoyable stage of the process since you can finally see the completed item begin to take form and the conclusion is clearly in sight. Imagine that big country sink you’ve been looking at for months finally making a grand entrance in your newly renovated room.

During this time, things like the sink, tap, and trash chute need to be added to the kitchen. This is also a time when you might notice some small water problems. If you need advice or help, talk to a skilled individual.


Get Some New Things

After the cabinets and pipes are set up, you can put in your new appliances. This involves things like the oven, stove, fridge, and more that are built in. If you’re installing expensive things like a wine chiller or a water filtering system, now is also the time to do so.


Put In New Floors

It’s lastly time to put in new flooring. This stage is a bit of a debate among many people who work in home improvement. Some people like to put in tile or wood before installing cabinets. Some people think it’s best to leave it for the end. And many others choose to decide on this project by project.

Modern gray kitchen remodel features dark gray cabinets paired with white quartz countertops

Enjoy Your New Kitchen.

Congratulations! The project to fix up the house is done. Now you can sit back and enjoy your new, beautiful kitchen. Serve a favorite dish to guests or pour a drink of wine. You now have a wonderful space to build memories and enjoy, whether you did it yourself or paid a contractor.


Ready to start making changes to your kitchen? Newlook Remodel helps people in Chicago make their homes what they want them to be. For years, we have been remodeling kitchens and all other parts of homes. Contact us right away to set up a meeting for a free project review.


Scroll to top